
Contents
How to Make Planner Stickers By Yourself At Home
Planner stickers are a fun and creative way to personalize your planner, journal, or notebook. They can help you organize your tasks, track your habits, decorate your pages, and express your style. But buying planner stickers can be expensive, and sometimes you can’t find the exact ones you want. That’s why making your own planner stickers at home can be a great option. You can customize them to suit your needs and preferences, and save money in the process.
Step 1: Choose Your Design Software
The first step in making planner stickers is to choose a design software that you are comfortable with and that suits your needs. There are many options available, depending on your budget and skill level. Here are some of the most popular ones:
– Microsoft Word: This is a free and easy-to-use software that you probably already have on your computer. You can use Avery templates to create your planner stickers, and add your own colors, fonts, backgrounds, and clip art. You can also import images from the internet or your own photos. The downside of using Word is that it can be hard to get exact sizes and alignments, and the quality of the images may not be very high.
– Canva: This is a free online software that allows you to create beautiful and professional-looking designs. You can choose from thousands of templates, graphics, fonts, and colors, or create your own from scratch. You can also upload your own images or use the ones from Canva’s library. The advantage of using Canva is that it is very user-friendly and has a lot of options to customize your stickers. The disadvantage is that you need an internet connection to use it, and you may need to pay for some of the premium features or elements.
– Cricut Design Studio: This is a free software that works with Cricut cutting machines. You can use it to design your stickers, and then send them directly to your machine to cut them out. You can use Cricut’s images and fonts, or upload your own. You can also use the Print then Cut feature, which allows you to print your stickers on your home printer, and then cut them with your Cricut. The advantage of using Cricut Design Studio is that it is easy to use and compatible with your machine. The disadvantage is that it has limited design options, and you may need to pay for some of the images or fonts.
Step 2: Choose Your Sticker Shapes and Sizes
The next step is to decide what shapes and sizes you want your planner stickers to be. This will depend on the type of planner you have, and how you want to use your stickers. For example, if you have a Happy Planner, you may want to make stickers that fit the boxes, headers, and columns of your planner. If you have a bullet journal, you may want to make stickers that are smaller and more flexible.
You can use a ruler or a measuring tape to measure the dimensions of your planner pages, and then use those measurements to create your stickers. You can also use templates or guides that are available online, such as this one for the Happy Planner. You can also use standard label sizes, such as Avery labels, which are already pre-cut and ready to use.
Step 3: Choose Your Design Elements
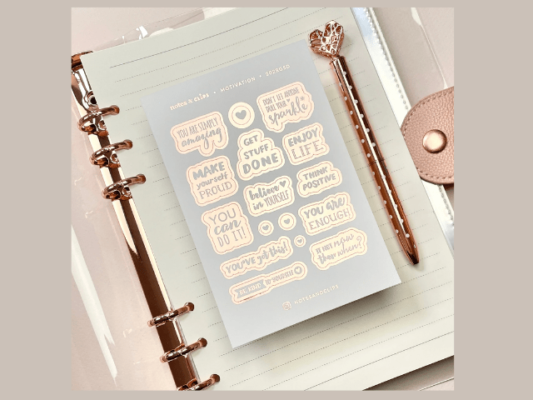
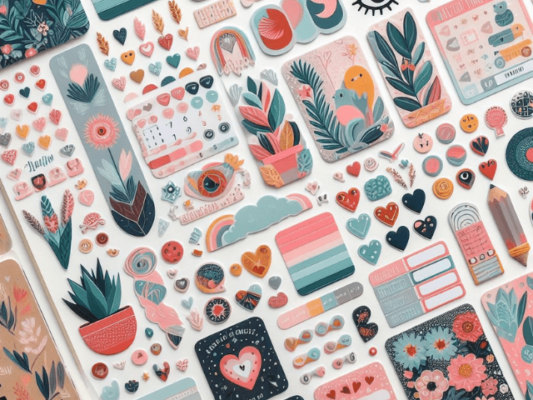
The third step is to choose the design elements that you want to include in your planner stickers. This is where you can unleash your creativity and have fun. You can use any combination of colors, fonts, backgrounds, graphics, images, icons, and text to create your stickers. You can also use themes, such as seasons, holidays, hobbies, or moods, to inspire your designs.
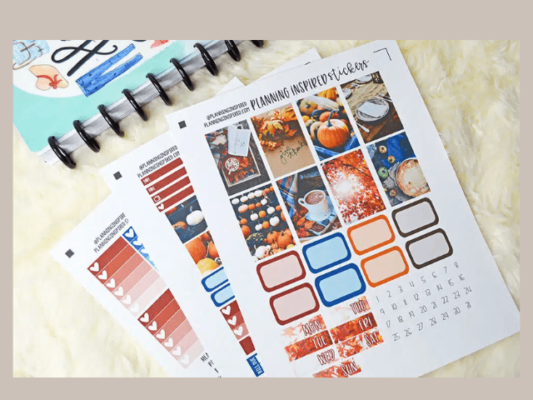
You can find a lot of design elements online, such as free clip art, fonts, and images. You can also use your own photos or drawings, or create your own graphics using shapes and tools in your software. You can also use stickers that are already made by other people, and print them out or modify them to suit your needs. You can find a lot of free printable planner stickers online, such as these from Goldmine and Coco.
Step 4: Design Your Stickers
The fourth step is to design your stickers using your software and your chosen elements. You can either start from scratch or use a template or a guide to help you. Here are some tips to help you design your stickers:
– Use layers to organize your elements and make it easier to edit them.
– Use grids, guides, and rulers to align your elements and make sure they fit your sticker size.
– Use the color picker tool to choose colors that match or complement each other.
– Use the text tool to add words, phrases, or quotes to your stickers. You can also use the font tool to change the size, style, and color of your text.
– Use the shape tool to create basic shapes, such as circles, squares, or stars. You can also use the pen tool to create custom shapes, such as hearts, flowers, or arrows.
– Use the image tool to insert images, such as photos, clip art, or icons. You can also use the crop, resize, rotate, and flip tools to adjust your images.
– Use the effects tool to add filters, shadows, outlines, or gradients to your elements.
– Use the group, ungroup, duplicate, and delete tools to manage your elements and make copies or changes.
Step 5: Save and Print Your Stickers
The fifth step is to save and print your stickers. You can either print them at home using your own printer or have them printed by a professional service. Here are some tips to help you print your stickers:
– Save your stickers as a PDF file, which is the most compatible and high-quality format for printing.
– Choose the best quality settings for your printer, such as high resolution, photo quality, or best quality.
– Choose the right paper type and size for your printer, such as label sheets, sticker paper, or cardstock. Make sure the paper is compatible with your printer, and that it matches the size of your stickers.
– Load the paper into your printer, and make sure it is aligned correctly.
– Print a test page first, to check the colors, sizes, and alignments of your stickers. Make any adjustments if needed, and then print the rest of your stickers.
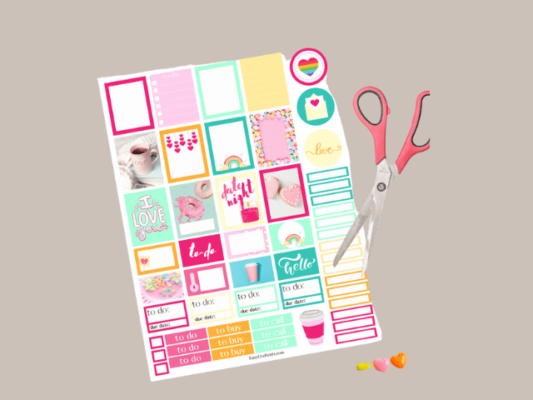
Step 6: Cut Out Your Stickers
The final step is to cut out your stickers. You can either use a cutting machine, such as Cricut or Silhouette or use scissors and a ruler. Here are some tips to help you cut out your stickers:
– If you are using a cutting machine, you will need to use the software that comes with your machine, such as Cricut Design Studio or Silhouette Studio. You will also need to use the Print then Cut feature, which allows you to print your stickers on your home printer, and then cut them with your machine. You will need to follow the instructions on your software and your machine to set up and use this feature.
– If you are using scissors and a ruler, you will need to cut along the edges of your stickers, using the ruler to guide you and keep your lines straight. You can also use a craft knife or a paper trimmer to make the cutting easier and faster. You may also want to leave a small margin around your stickers, to make them easier to peel off.
Congratulations, you have just made your own planner stickers by yourself at home! You can now use them to decorate and organize your planner and enjoy the satisfaction of having created something unique and personal. Have fun and happy planning!